
“How to transfer photos from iPhone to computer? I want to transfer some photos to my PC and take their backup, but can’t seem to find a feasible solution.”
If you have a query like this, then this would be the last guide that you will read. It doesn’t matter if you wish to take a backup of your photos or would like to make some free space on your phone, we have got you covered. Most of the users think that in order to transfer photos from iPhone to computer, they need iTunes. Trust me – you don’t have to go through so much hassle. In fact, in this guide, we will cover 3 step-wise tutorials to transfer your photos from iPhone X/XS/XR/8 etc. to your Mac or Windows system.

Solution 1: Directly Transfer Photos from iPhone to Computer
To start with, let’s get to know about the simplest and the fastest way to transfer your photos between your computer and iOS device. By using dr.fone – Transfer (iOS), you can easily manage your data and move them across different devices. For instance, you can transfer photos between iPhone and computer, iPhone and iPhone/Android, and iPhone and iTunes. The best thing about the tool is that you don’t need iTunes to transfer your data.
Not only photos, you can also transfer your videos, contacts, messages, music, and more. It is compatible with all the popular iOS devices like iPhone X, iPhone XS, iPhone XS Max, iPhone XR, etc. The desktop version is available for both, Windows and Mac. To learn how to transfer photos from iPhone to computer using dr.fone – Transfer (iOS), follow these simple steps:
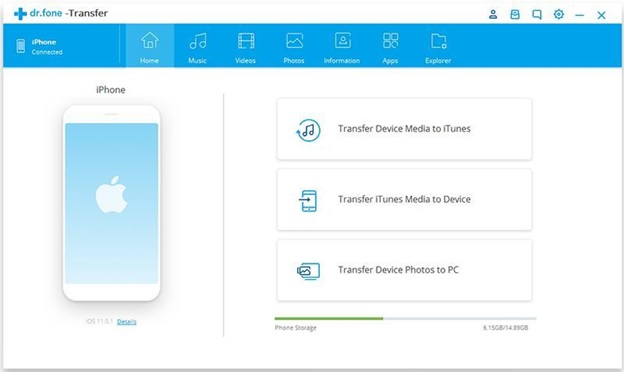
- Firstly, go to the official website of dr.fone – Transfer (iOS) and install it on your Mac or Windows. Launch the dr.fone toolkit and choose the “Transfer” module from its home.

- Whenever you wish to transfer photos from iPhone to computer, connect your device to the system using an authentic cable. If you are connecting it for the first time, then you need to “Trust” the computer.

- The application will automatically detect your device and provide its snapshot with some shortcuts.
- Now, go to the “Photos” tab on the dr.fone interface. The application will provide a well-categorized view of your photos in different albums.
- You can simply preview your photos from here and select the pictures that you wish to move.
- After selecting your photos, click on the export button on the toolbar and choose to transfer the photos to your computer.
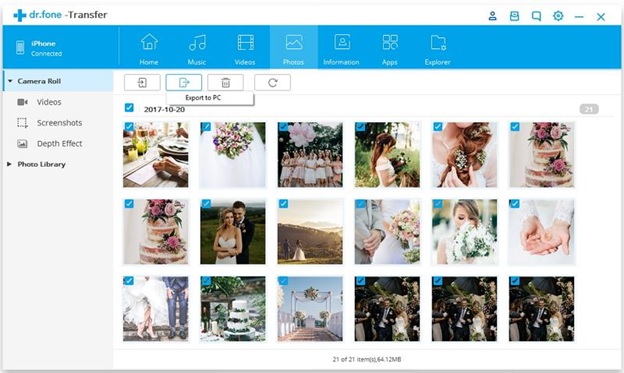
- A browser window will be launched so that you can save your photos to a known location on your computer.
Solution 2: Transfer photos from iPhone to Computer wirelessly
If you don’t want to connect your iOS device to the system in order to transfer your data, then you can always take the assistance of iCloud. While the solution might sound simple, it comes with a catch. By default, every Apple user only gets 5 GB of free space on iCloud. Since your photos can acquire a large chunk of its storage, you might have to buy more space on your iCloud account. Also, the process can consume your network data as well.
After making sure that your iCloud account has enough free space, you can follow these steps to transfer photos from iPhone to computer.
- Unlock your device and go to its Settings. Tap on your Apple ID to continue.
- Visit the iCloud settings from here and make sure the “iCloud Photo Library” option is turned on. This will automatically upload your photos to iCloud and make them available on multiple devices.

- If you want, you can also enable Photo Stream from here and customize how you wish to upload your photos (in the original or optimized format).
- Once your photos are uploaded to iCloud, you can launch the iCloud application on your computer to access them. If you don’t have it on your Windows PC, then you can simply download it from iCloud’s website.
- Launch the iCloud application and log-in with the same iCloud account. Afterward, turn on the “Photos” option on the app.
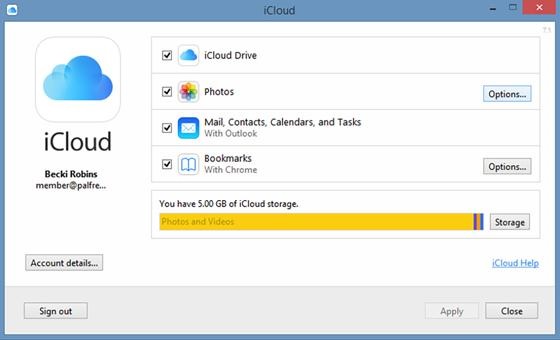
- To further customize things, click on the “Options” button adjacent to Photos.
- This will open the Photos Option on the screen. From here, you can enable the iCloud Photo Library and choose to download photos and videos to PC. You can also browse the default location where the downloaded photos will be stored.

Solution 3: Transfer hidden, inaccessible, or lost photos to computer
Too often, we end up losing our important photos out of the blue on our iOS devices. Your photos might become inaccessible, could be accidentally deleted, or be hidden. Even if your device has suffered from an unwanted data loss, you can still recover your lost photos.
To do this, take the assistance of dr.fone – iPhone Data Recovery. Easy to use, it is one of the first data recovery tools for iOS devices. With it, you can recover your lost photos, videos, contacts, messages, notes, and more. It is compatible with every leading iPhone model. Before you take the following steps to transfer your data, just make sure that the auto-sync option on iTunes is turned off.
- Launch the dr.fone toolkit and choose the “Recover” option from its home. Also, connect your iPhone to the system and wait for it to be detected.
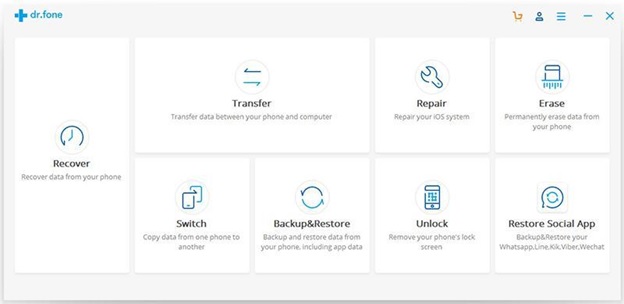
- Once your iOS device has been detected, you will get the following screen. From the left panel, choose to recover data from iOS device.
- Now, you can simply select the type of data that you wish the application to scan. You can choose to scan the existing data as well as the deleted content.
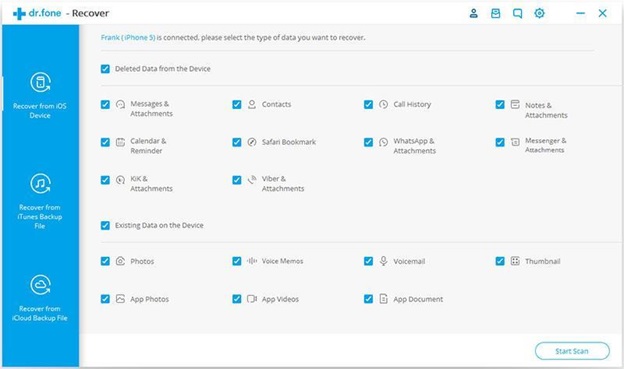
- After checking the “Photos” option, click on the “Start Scan” button. Wait for a while as the application would scan all the existing and deleted photos on your device.
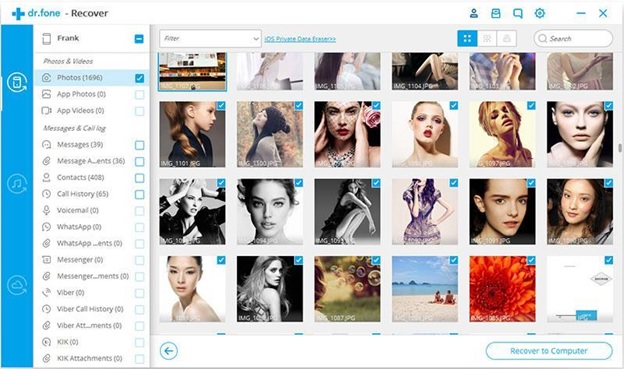
- As soon as the scan is completed, the recovered data would be displayed in different categories. You can simply visit any folder from the left panel and preview your photos.
- Simply select the photos you wish to transfer and click on the “Recover” button to transfer them directly to your computer.
There you go! Now when you know how to transfer photos from iPhone to computer in three different ways, you can easily fulfill your requirements. As you can see, dr.fone toolkit provides two dedicated solutions to do the same. Extremely easy to use, it is compatible with all the leading iOS devices and will let you manage your photos like a pro!


