
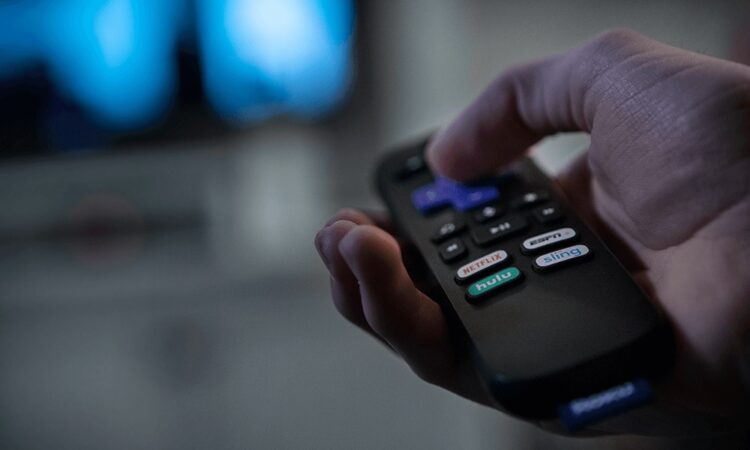
Roku has revolutionized the way we stream content on our televisions. From movies and TV shows to on-demand content, Roku devices bring a plethora of entertainment options to our fingertips. But what happens when your Roku remote goes missing or needs a replacement? This guide will walk you through the process of connecting a new Roku remote to your Roku device, ensuring a seamless continuation of your binge-watching sessions.
Understanding Roku Remotes
Before diving into the pairing process, it’s essential to recognize that there are two main types of Roku remotes:
- IR (Infrared) Remotes: These remotes work on infrared signals and need a direct line of sight to function.
- Enhanced “point-anywhere” Remotes: Using wireless technology, these remotes don’t require direct visibility to the Roku device and come with extra features like voice search.
Connecting an IR Roku Remote
1. Line of Sight: Ensure there’s a clear line of sight between the remote and the Roku device. This means no obstacles should be present in the pathway of the signal.
2. Insert Batteries: Open the battery compartment and insert the required batteries, typically AAA.
3. Direct and Press: Point the remote directly at the Roku device and press any button. Since IR remotes don’t technically “pair,” pressing any button should immediately send the command to your Roku device.
Connecting an Enhanced “Point-Anywhere” Roku Remote
1. Insert Batteries: Start by inserting the appropriate batteries into your new remote.
2. Power On Roku: Ensure your Roku device is switched on. If it’s off, use the device’s power button or the old remote to turn it on.
3. Pairing Mode: Once the device is on, it should automatically enter pairing mode if it doesn’t detect an already paired remote. You’ll recognize pairing mode by a flashing green light on the device.
4. Press and Hold the Pairing Button: On your enhanced remote, locate the small button, typically found in the battery compartment. Press and hold this button for 3-5 seconds.
5. Wait for Visual Confirmation: Once the remote successfully pairs with the Roku device, you’ll notice an on-screen prompt or message confirming the pairing.
6. Test the Remote: Try navigating the Roku menu using the new remote to ensure it’s correctly connected.
Troubleshooting Tips
- Resetting the Roku Device: If you’re having difficulty pairing, consider restarting your Roku device. Sometimes, a simple reset can solve connectivity issues.
- Battery Check: Ensure the batteries in the remote are fresh and correctly oriented.
- Update Roku Software: Keeping your Roku device updated can solve many technical glitches. If you have access to the menu using another control method, ensure your Roku device’s software is up-to-date.
Maintaining a Healthy Connection
- Regular Updates: Keep your Roku software updated for a smooth experience.
- Line of Sight for IR Remotes: Always ensure that there are no obstacles blocking the signal between the IR remote and the Roku device.
- Proper Storage: Store the remote in a safe place to avoid damage or misplacement.
Conclusion
Connecting a new Roku remote, whether it’s an IR or enhanced version, is a straightforward process. By following the above steps and ensuring a few preventive measures, you can enjoy uninterrupted streaming on your Roku device. So, grab some popcorn, sit back, and dive back into your favorite shows!

